Home / Articles / Tagged: busy kids

Easy Two - Ingredient Cloud Dough

Easy Two - Ingredient Cloud Dough

Easy Two - Ingredient Cloud Dough


Easy Cloud Dough Ingredients

  • Hair conditioner. Any kind, as long as it’s creamy and CHEAP. Don’t use the expensive stuff. Keep in mind that your play dough will smell like the conditioner, so use something that smells great.
  • Cornstarch.
  • A bowl.
  • A popsicle stick or spatula.
  • Gel food colors (optional)

How to Make Cloud Dough

Put equal parts hair conditioner and cornstarch in your bowl, and start mixing them together. It will most likely look like marshmallow fluff at this point, which is way too wet.

Start adding more cornstarch in slowly and mixing as you go. You’ll end up with close to a 2 part cornstarch to 1 part conditioner ratio, but that depends on your brand of conditioner and cornstarch. Once it isn’t quite coming together with the spatula, use your hands and start squishing it together. If it’s too wet, add more cornstarch. If it feels too dry, add more conditioner. When you’re happy with the feel of your cloud dough, roll it up into a big ball!

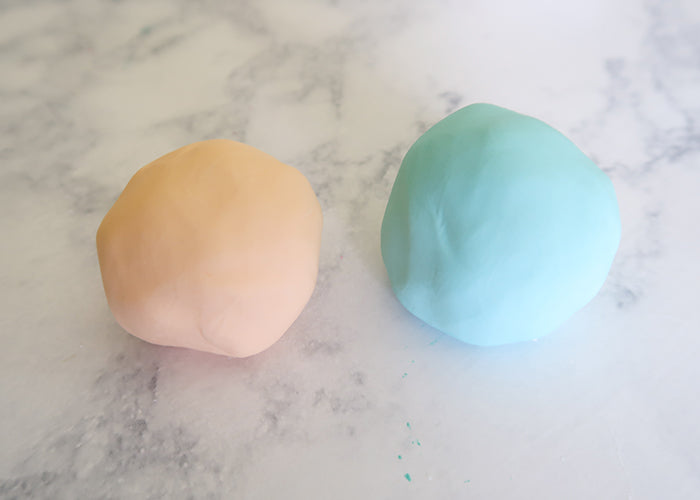
If you want to add color, just grab some gel food colors. Separate your cloud dough into balls for how many different colors you want, and use your knuckle to make an indent in the ball. Add one drop of color to each ball.

Then fold up the dough around the color drop, and start mixing it in until the color is fully incorporated. If the dough feels too wet after adding the color, just sprinkle on a tiny bit of cornstarch and kneed it in.

Source: woojr

And you’re all done!


How to Make an Oil and Water Sensory Bag for Science Fun

What’s great about sensory bags is they are so, so, so simple to put together. AND they are completely mess free. That means you can take them on the go, in the waiting room, at restaurants, and you can give them to small children who might otherwise try to put sensory objects into their mouths

To make this Oil and Water Sensory Bag, you will need:

Since this sensory bag is full of liquid, you really want to reduce the risk of bursting. Freezer bags can had weak corners and dripping can happen with the smallest of holes. So the first thing you want to do is tape up the 3 closed sides of your bag with tape.

Place the tape on half of the bag and fold it over to the other side. I suggest doing the sides first and then the bottom.

Once your tape is in place, it’s time to put the bag together.

Start with your baby oil. I don’t measure, but I probably used about 1/4 of a cup of oil.

Then drip in some of your food coloring.

Then add some water. About 1/4 of a cup of water too.

Seal the bag, pushing out most of the air. I do leave a small pocket of air in this sensory bag- but not enough that it could potentially pop.

Tape up the open edge of the bag and it’s ready to play!


Source: everydaychaosandcalm

Leaf Sunflower Craft – Fall Crafts for Kids

Leaf Sunflower Craft – Fall Crafts for Kids

Leaf Sunflower Craft – Fall Crafts for Kids

by Andreja

What you need:

  • yellow leaves (or any other color and yellow paint)
  • brown construction paper
  • white school glue
  • duct tape
  • scissors
  • green paper drinking straws

Cut two circles per sunflower from brown construction paper (we used duct tape for circle template).

If you didn’t find any leaves that are yellow, you can color them. Let them dry before continuing.

Apply a generous amount of glue on the brown circle. Stick leaves onto it, all around.

Add a generous amount of glue on the first layer of leaves (over the brown circle area). Add another layer of leaves.

Add another generous amount of glue and stick on another brown circle. Press down for the glue to set.

Attach a green paper drinking straw with some duct tape. Leave a while for the white glue to dry completely (or somewhat). Your leaf sunflower craft is finished.